Fall Focaccia with Bell Pepper Maple Leaves

This post may contain affiliate links. As an Amazon Associate, I earn from qualifying purchases. View our full disclosure here.
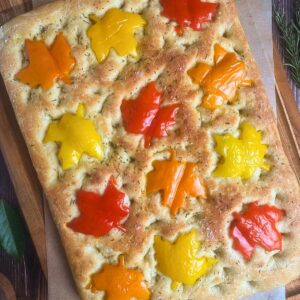
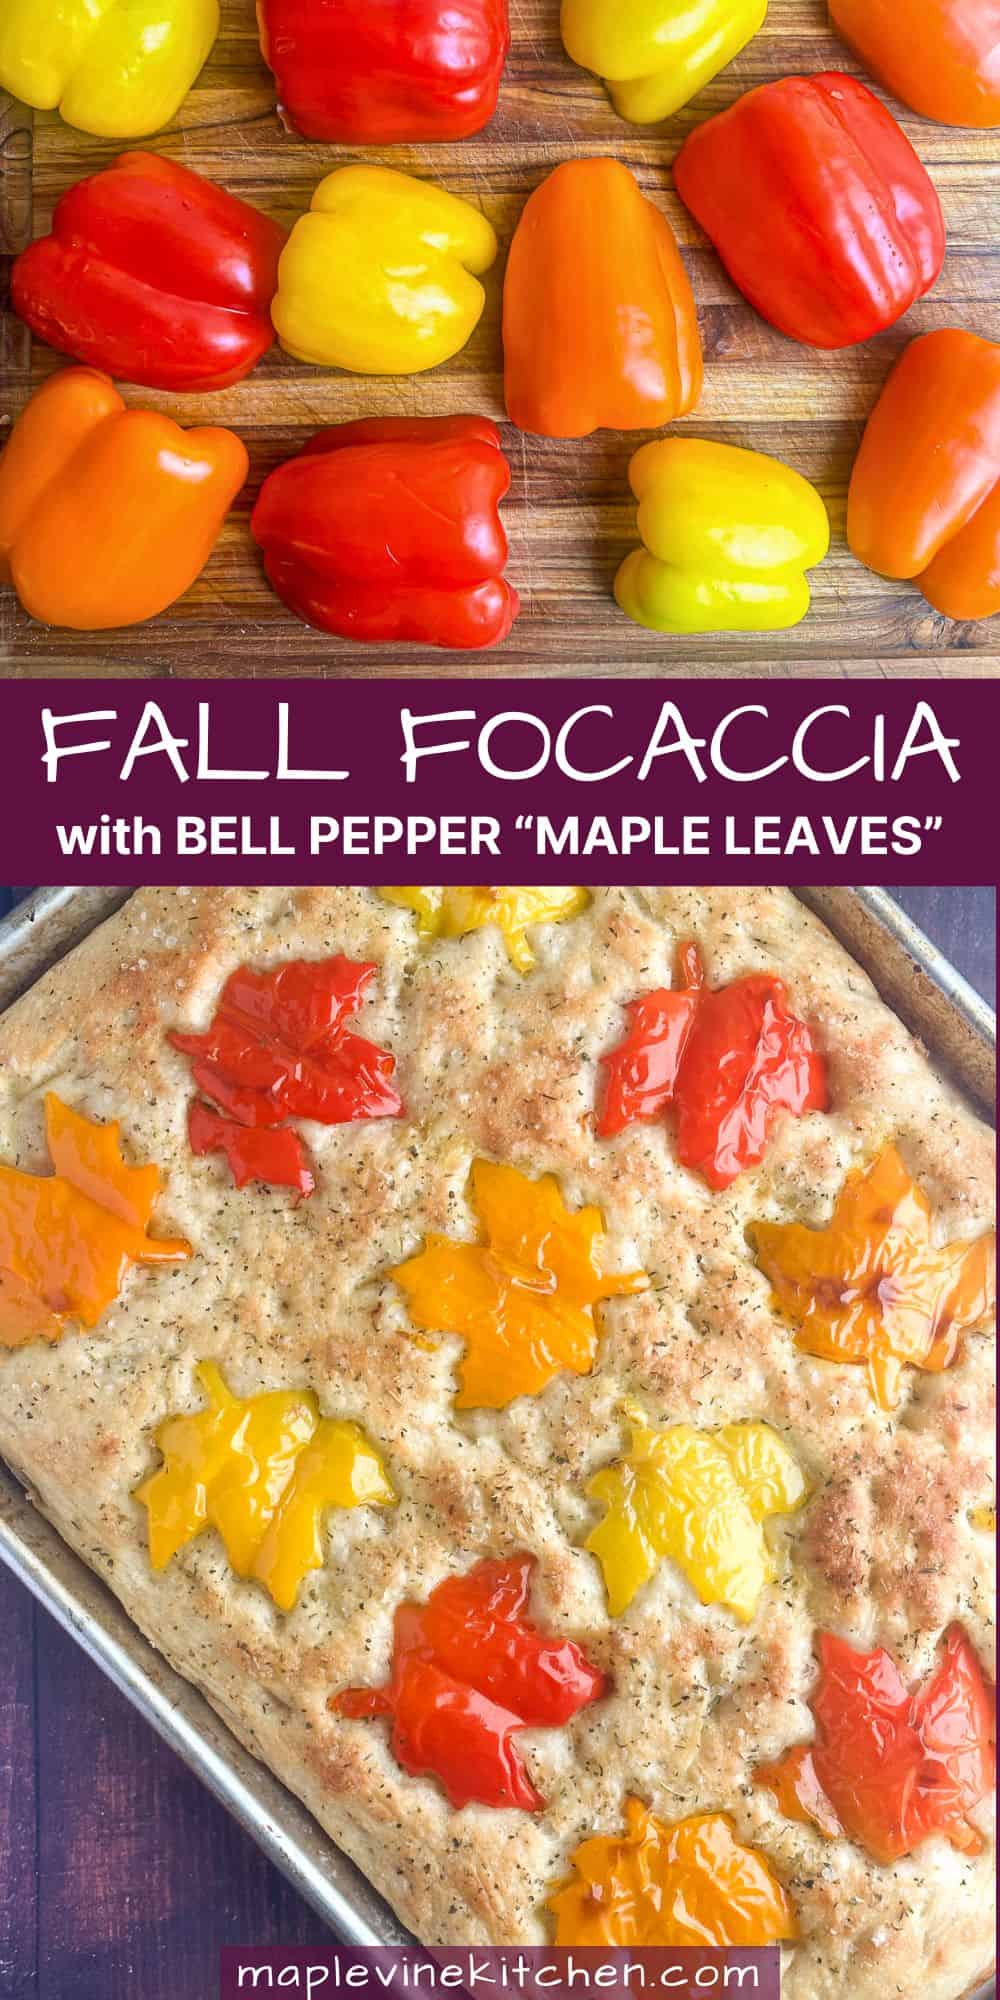
This easy fall focaccia brings a little creativity to the table, with colorful bell pepper “maple leaves” baked into a golden, garlicky loaf. It’s part bread, part edible centerpiece—and exactly the kind of fall recipe I can’t resist.

An Edible Fall Centerpiece
With my art history background and love of food styling, focaccia bread art was always going to get my attention. I loved the idea of turning a simple Italian flatbread into something beautiful enough to become part of a festive fall table.
For my version, I cut red, orange, and yellow bell peppers into maple leaves and arrange them across garlicky, olive oil-brushed dough. Set the finished focaccia out whole so everyone can admire the colorful design before you cut it into squares.
Serve it with soup or chili, bring it to a fall gathering, or add it to your Thanksgiving menu alongside more of my easy fall side dishes.

What Is Focaccia Bread Art?
Focaccia bread art is a decorative baking technique that uses the broad, dimpled surface of focaccia as a canvas. Vegetables, herbs, olives, and other toppings are arranged into a design before the bread is baked.
This autumn focaccia keeps the process surprisingly simple: a maple-leaf cookie cutter does most of the artistic work. The pepper shapes don’t need to be perfect, either—a few natural curves make the leaves look even more convincing once baked.
Why This Recipe Works
Ingredient Notes
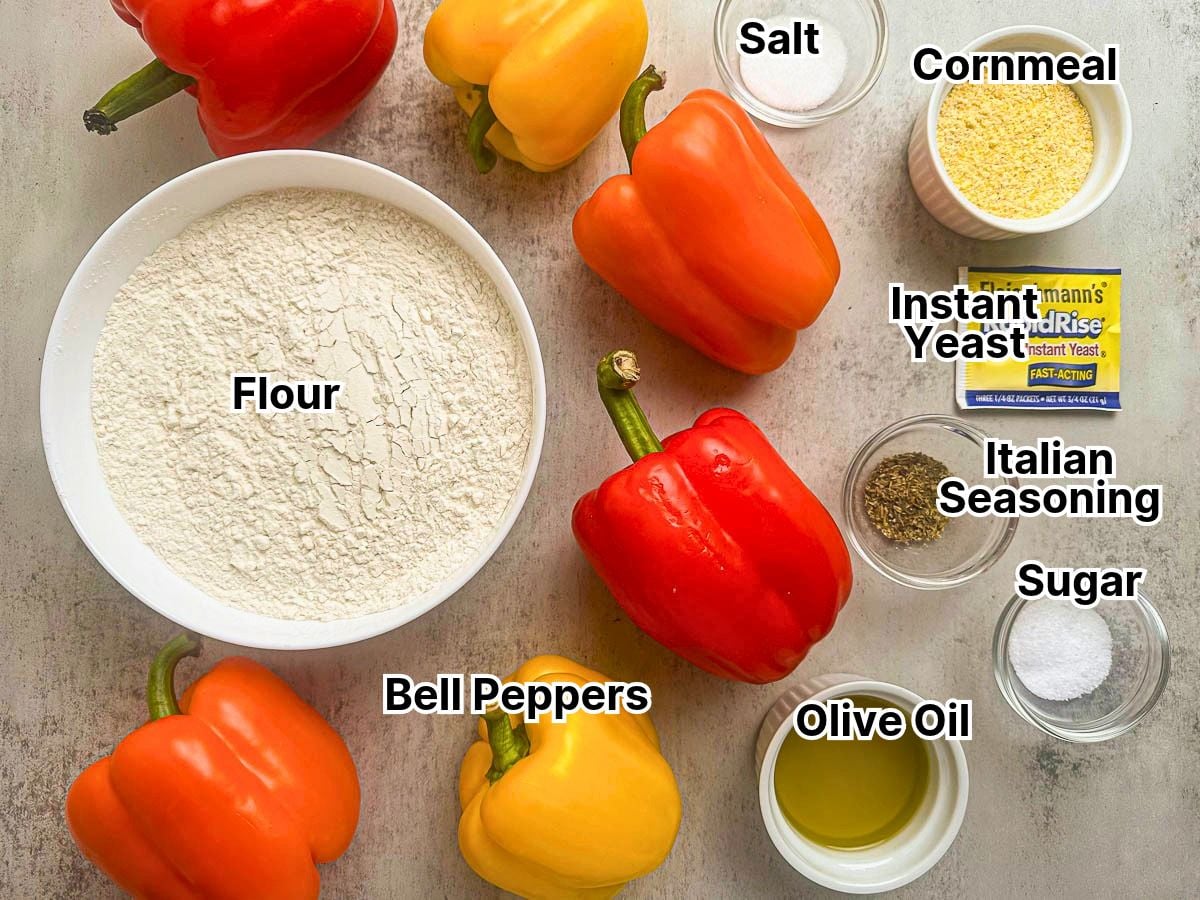
- Instant yeast: RapidRise or another instant yeast keeps the rising time manageable for a same-day focaccia. Check the package date since older yeast may produce a slower or weaker rise.
- Bread flour: Bread flour gives this focaccia the structure and chew needed to support the bell pepper art. All-purpose flour can be substituted for a slightly softer result.
- Cornmeal: Mixed into the dough, cornmeal adds subtle nutty flavor and a little extra texture. You can leave it out for a more traditional, smoother crumb.
- Italian seasoning: A dried Italian seasoning blend distributes easily throughout the dough. Rosemary, thyme, or oregano also work well, especially sprinkled over the top.
- Extra-virgin olive oil: Olive oil flavors the bread, keeps the crumb tender, and helps create a golden bottom crust. This is one of those recipes where using an olive oil you enjoy tasting really matters.
- Fresh garlic: Gently warming the garlic in the olive oil spreads its flavor throughout the focaccia. Keep the heat low and remove it before the garlic browns, which can make it taste bitter.
- Flaky sea salt or Parmesan: I love finishing the focaccia with Maldon sea salt. Freshly grated Parmigiano Reggiano is another savory option, or you can use a light sprinkling of both.
- Bell peppers: Choose firm red, orange, and yellow peppers with broad, relatively flat sides. Those flatter panels are much easier to cut into clean maple-leaf shapes.
See the recipe card below for the full ingredient list and measurements.
🍁 Plan for the pepper scraps: Cutting out the maple leaves will leave you with plenty of usable bell pepper pieces. Save them for scrambled eggs, soup, fall harvest chili, or Italian roasted vegetables, and see the leftover-pepper ideas below for more suggestions.

Step-By-Step Directions
Make the dough
Step 1
Place the warm water in the bowl of a stand mixer fitted with the dough hook. Sprinkle the yeast over the water and stir (image 1).
Step 2
Add the flour, cornmeal, salt, sugar, and 1 teaspoon Italian seasoning and stir on low to combine (image 2).

Step 3
Knead with the dough hook on medium speed for about 4 minutes (image 3), or by hand for about 5 minutes. The finished dough should be soft, stretchy, and sticky but no longer look like a loose batter. Add extra flour only if needed, 1 tablespoon at a time.
Step 4
Form the dough into a ball. Drizzle about 1 tablespoon of olive oil in a large bowl; add the dough and drizzle more oil, turning to coat thoroughly in the oil to prevent it from drying out during the rise (image 4). Cover with a lid or plastic wrap and let rise in a warm area until doubled in size, 1 to 1 ½ hours.
Prepare the peppers
Step 5
Cut each bell pepper in half vertically; remove stems and seeds (image 5). Place each bell pepper half cut side down and use a maple leaf cookie cutter (image 6) to carefully cut out the maple leaves (image 7) by pressing down firmly. *Peppers are not nicely flat objects so don’t worry if the cutouts are not perfect! You can trim the undersides of any bulky ribs to help the “leaves” lay flat.

Make the garlic oil
Step 6
In a small pan combine ¼ cup olive oil and minced garlic (image 8). Cook over low heat stirring frequently for 2 to 3 minutes or until aromatic, but before the garlic browns. Remove from heat and set aside.
Finish and decorate the dough
Step 7
Preheat the oven to 425°F (220°C). Brush a 18 x 13-inch rimmed baking sheet with 2 tablespoons of the garlic oil. Press and gently deflate the dough (image 9) and transfer to the prepared sheet and roll in the oil to coat. Then using your fingertips, lightly press the dough and shape to fit the edges of the pan (image 10). Let the dough rise, uncovered, in a warm place until puffy with a few visible bubbles, about 30 minutes.

Step 8
Drizzle and brush the dough generously with the remaining garlic oil (image 11). Sprinkle with the remaining Italian seasoning and the flaky sea salt (or shredded parmesan). Use your fingers to make deep dimples in the dough (image 12). Lastly evenly distribute and press the pepper “maple leaves” into the surface of the dough (image 13); making a colorful pattern (image 14). Then lightly brush a little olive oil on the tops of the peppers.


Bake the focaccia
Step 9
Bake in the preheated oven for 20 to 25 minutes, or until the focaccia is deeply golden on the top and edges with a crisp underside. Once baked, remove the focaccia from the oven and let it cool for a few minutes. You can cut it into squares or slices and serve it warm or at room temperature.

The Little Details
- Weigh the flour: A kitchen scale gives you the most consistent dough, especially with a wetter focaccia recipe.
- Keep the dough soft: Focaccia dough should feel sticky and stretchy. Resist adding too much extra flour, which can make the finished bread dense.
- Watch the dough, not just the clock: The first rise is complete when the dough has roughly doubled. After shaping, let it rise again until puffy with a few visible bubbles.
- Let it rest if it springs back: If the dough resists stretching to the edges of the pan, leave it alone for 5 to 10 minutes. The gluten will relax, making it much easier to shape.
- Don’t hold back on the garlic oil: A generous coating beneath and over the dough creates a golden crust, adds flavor, and keeps the bread from sticking.
- Help the pepper leaves lie flat: Pat the peppers dry and trim away any thick inner ribs. Press each shape firmly into the dough and brush it lightly with olive oil so it stays attractive while baking.
- Show it off before slicing: Set the focaccia out whole so everyone can see the design, then cut it with a sharp knife or pizza cutter to avoid flattening the airy crumb.
How to Use Up Bell Peppers
Cutting out the maple leaves will leave you with plenty of perfectly good bell pepper pieces. Chop and refrigerate them for egg scrambles, salads, soups, or pasta, or use them in my Italian roasted vegetables, fall harvest chili, or creamy chicken corn chowder.
You can also freeze the scraps for later. Spread them in a single layer until frozen, then transfer them to a freezer bag. Their texture will soften after thawing, so they’re best added directly to cooked dishes.

Serving Suggestions
This fall focaccia works as an appetizer, a seasonal bread for dinner, or even the starting point for some very good sandwiches. Here are a few of my favorite ways to serve it:
- With soup: Use it for dipping into creamy chicken corn chowder or a cozy bowl of mushroom and potato soup.
- As a fall appetizer: Cut the focaccia into small squares and serve it with herb whipped ricotta dip or my creamy whipped truffle burrata spread.
- In the holiday bread basket: The colorful maple leaves make it a fun alternative to dinner rolls alongside roasted boneless turkey breast for Thanksgiving.
- On a seasonal board: Add focaccia wedges to a fall charcuterie board with cheeses, cured meats, apples, pears, and savory spreads.
- For brunch: Serve warm squares for dipping into Italian baked eggs in tomato sauce.
- As sandwich bread: Split leftover squares and fill them with fresh mozzarella, tomatoes, basil, roasted vegetables, or prosciutto.

FAQs
HUNGRY FOR MORE? Subscribe to our newsletter and follow on Facebook, Pinterest and Instagram for all the newest recipes!
Enjoyed this recipe? Be sure to leave a 5-star rating and comment—it helps others find our recipes too!
Fall Focaccia with Bell Pepper Maple Leaves Recipe
Equipment
- stand mixer with dough hook, optional
Ingredients
Focaccia Dough
- 2¼ teaspoons (7 grams) instant yeast
- 2 cups lukewarm water, about 105°F to 110°F
- 4 cups (500 grams) bread flour, plus more only if needed
- ⅓ cup (40 grams) cornmeal, optional
- 2 teaspoons kosher salt
- 2 teaspoons sugar
- 2 teaspoons Italian seasoning, divided
- extra-virgin olive oil, for coating the bowl
Garlic Oil and Toppings
- ¼ cup extra-virgin olive oil, plus more for brushing the peppers
- 2 small garlic cloves, minced
- flaky sea salt, such as Maldon, for finishing
- 3 tablespoons freshly grated Parmigiano Reggiano, optional
- 6 large bell peppers—2 red, 2 orange, and 2 yellow
Instructions
- Mix the dough: Pour the lukewarm water into the bowl of a stand mixer fitted with the dough hook. Sprinkle the instant yeast over the water and stir. Add the flour, cornmeal, kosher salt, sugar, and 1 teaspoon Italian seasoning. Mix on low until a shaggy dough forms.
- Knead: Knead on medium speed for about 4 minutes, or knead by hand for about 5 minutes. The dough should be soft, stretchy, and sticky but no longer resemble a loose batter. Add extra flour only if needed, 1 tablespoon at a time.
- Let the dough rise: Transfer the dough to a large oiled bowl and turn it gently to coat. Cover and let rise in a warm place for 1 to 1½ hours, until roughly doubled in size.
- Prepare the pepper leaves: While the dough rises, halve the bell peppers and remove the stems, seeds, and white membranes. Lay the pepper panels as flat as possible and press the maple-leaf cutter firmly through them. Trim away thick ribs from the undersides so the leaves lie flat, then pat the shapes dry.
- Make the garlic oil: Combine ¼ cup olive oil and the minced garlic in a small saucepan. Cook over low heat for 2 to 3 minutes, stirring occasionally, until fragrant. Remove it from the heat before the garlic begins to brown.
- Shape and rise again: Preheat the oven to 425°F. Brush an 18 × 13-inch rimmed baking sheet with 2 tablespoons of the garlic oil. Gently deflate the dough and transfer it to the pan, turning it to coat with oil. Stretch it toward the edges with your fingertips. If it springs back, let it rest for 5 to 10 minutes before continuing. Let rise uncovered for about 30 minutes, until puffy with a few visible bubbles.
- Dimple and decorate: Spoon the remaining garlic oil over the dough. With oiled fingertips, press deep dimples across the surface. Sprinkle with the remaining Italian seasoning and flaky salt, Parmesan, or a light amount of both. Arrange the pepper leaves across the dough, press them in firmly, and lightly brush their tops with olive oil.
- Bake: Bake for 20 to 25 minutes, until the top and edges are deeply golden and the underside is crisp. Cool in the pan for 10 minutes, then present the focaccia whole before cutting it into squares.
Recipe Notes
Nutrition
*Nutritional information is provided as a courtesy only and should be construed as an estimate rather than a guarantee. Ingredients can vary and Maplevine Kitchen makes no guarantees to the accuracy of this information.
Don’t forget to pin this for later
Did you make this recipe? Please leave a rating in the comments below and let us know how it turned out. Your feedback is important to us. Thank you for visiting Maplevine Kitchen!