
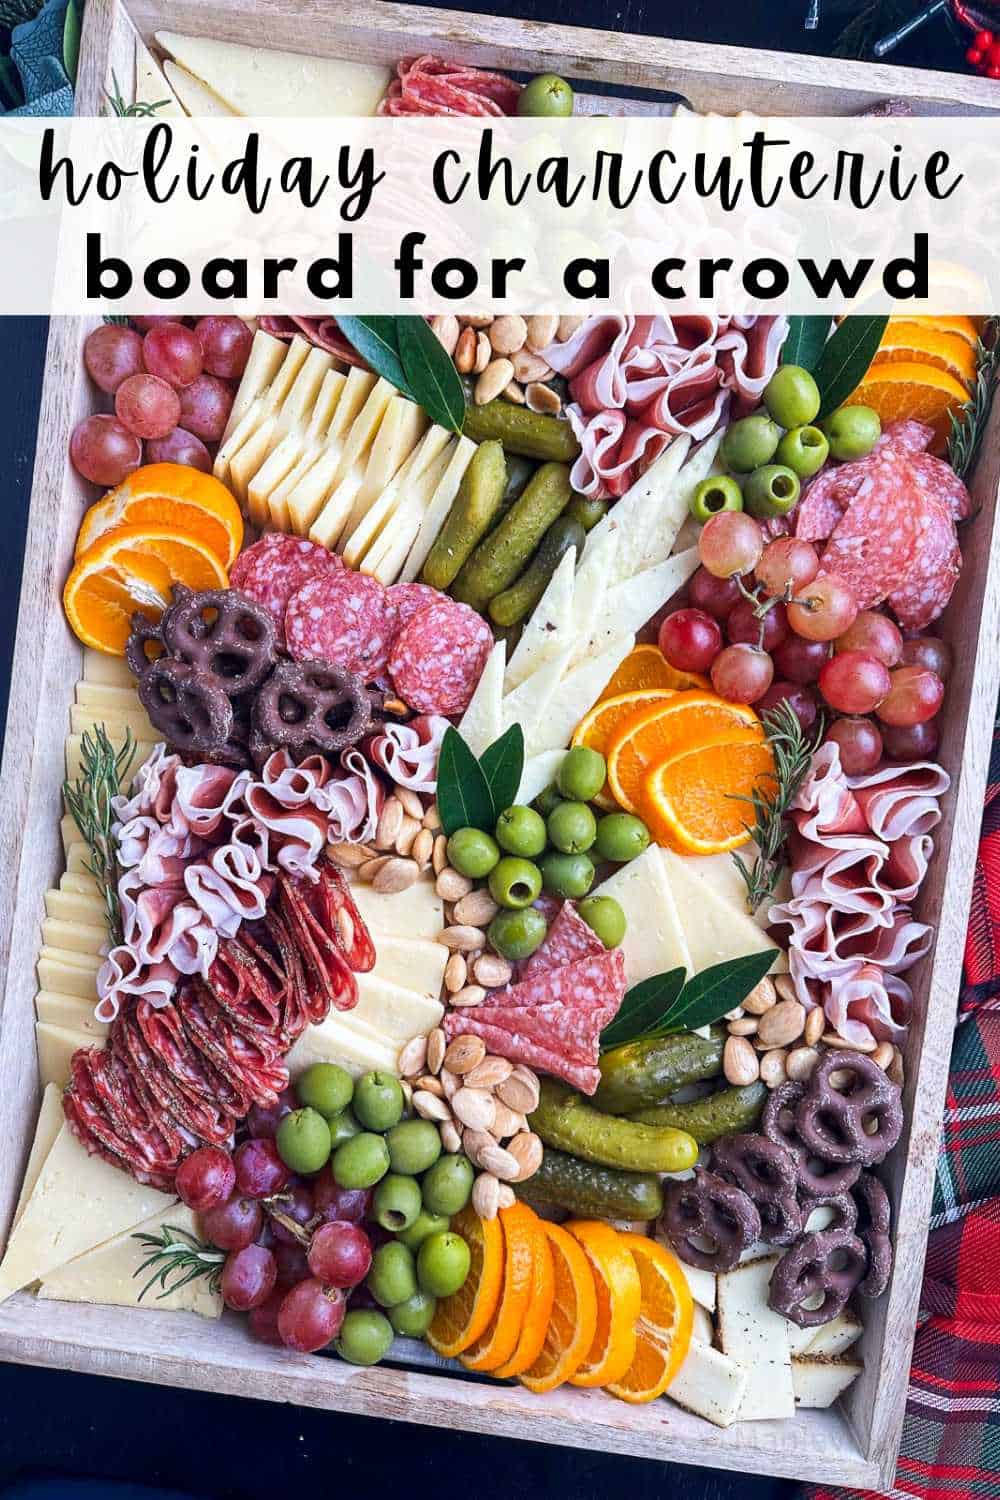
Holiday Charcuterie Board For A Crowd
This post may contain affiliate links. As an Amazon Associate, I earn from qualifying purchases. View our full disclosure here.
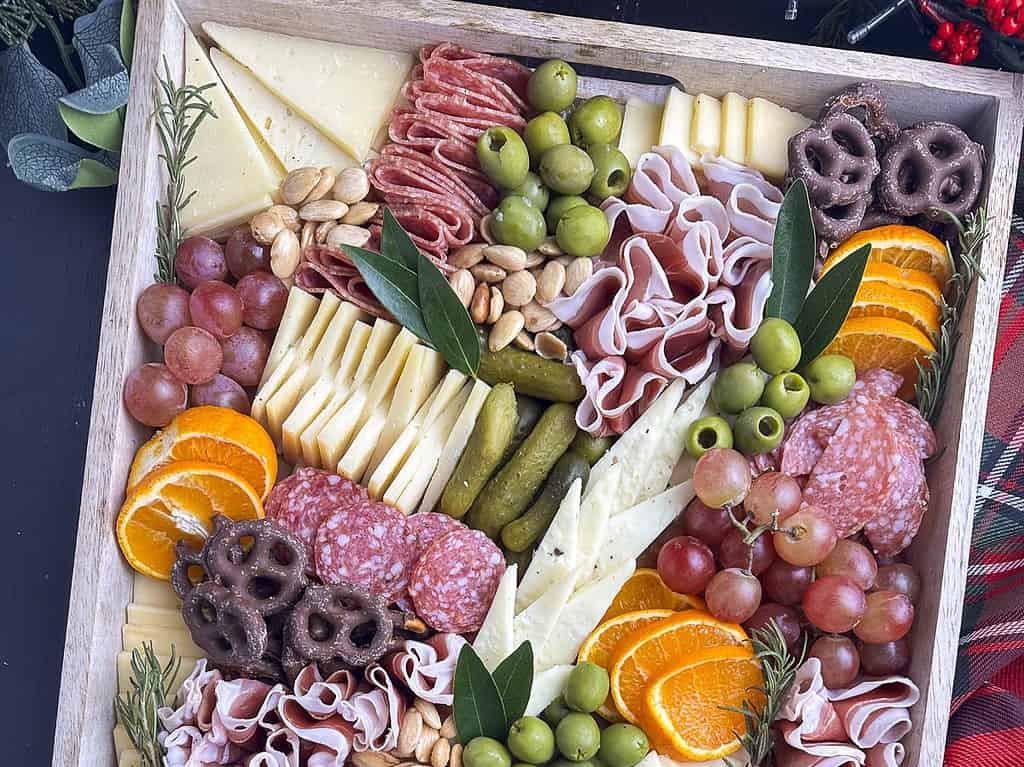
Looking to impress your friends and family this holiday season with minimal effort? I’ve got you covered with how to make the perfect, party-ready holiday charcuterie board! This extra-large spread is designed with broad appeal in mind to feed a diverse crowd, whether you’re hosting a cozy Thanksgiving gathering or a lively Christmas celebration. With creamy cheeses, savory meats, and a few seasonal surprises, it’s a simple yet impressive way to bring festive flair to your gathering.

Holiday Party Starter
If you’re hosting a holiday gathering this season and looking for a festive party appetizer that’ll impress without the stress, a big, beautiful charcuterie board is the answer.
Whether it’s Thanksgiving, Christmas, or New Year’s Eve, a charcuterie board can be an easy way to feed a crowd while still making everything feel a bit special.
Trust me, it’s not as complicated as it seems, and I’ve got all the tips you need to create a mouthwatering board that’ll have your guests coming back for more.
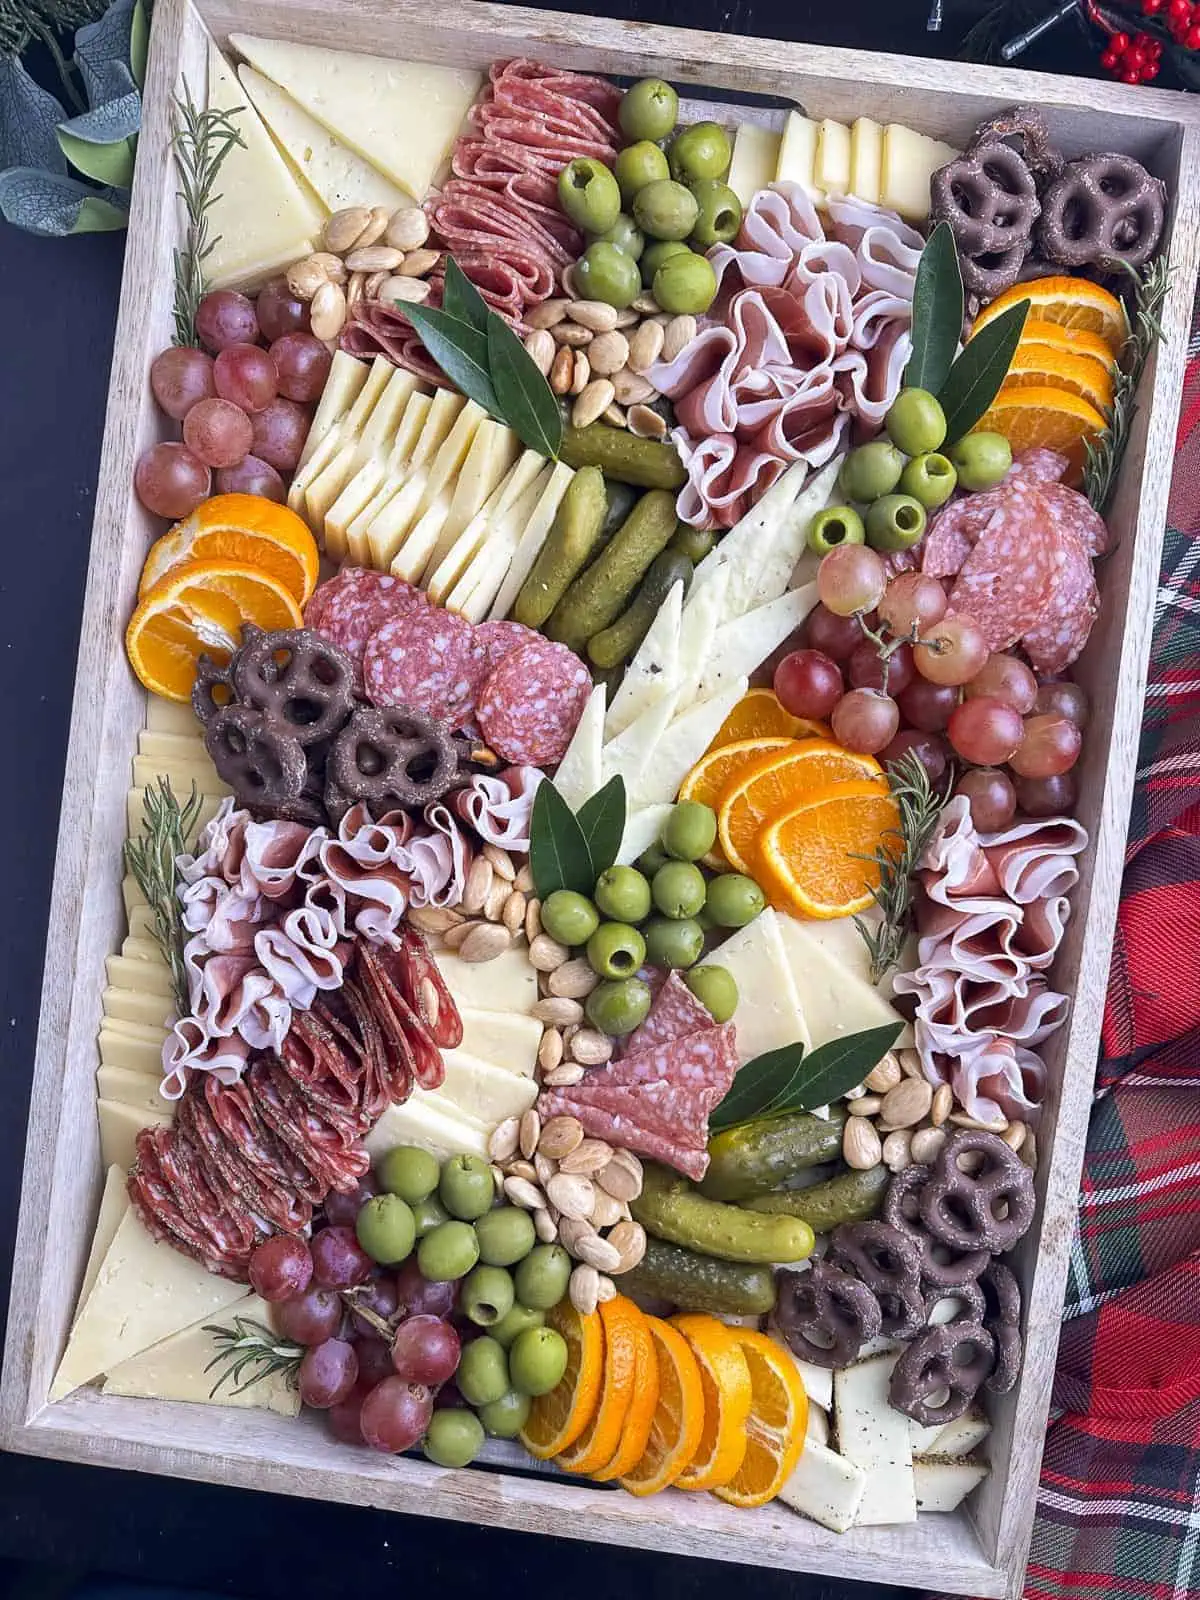
I recently made this holiday charcuterie board for a Thanksgiving celebration, and I loved how it turned out so much that I had to share it with you. The challenge? I am used to making smaller boards for 8-12 people no problem, but this time I needed to feed 30. Yep, 30.
It turns out there are a few things to keep in mind when scaling up, so I’ll walk you through everything I learned, from shopping at Costco to assembling a board that looks gorgeous and feeds a crowd, all without breaking the bank.
Complete the Menu
Pair this holiday charcuterie board with some of these appetizers for a festive holiday party spread:

Why a Holiday Charcuterie Board is Perfect for Large Gatherings
A holiday charcuterie board is a game-changer for any celebration. It’s easy, festive, and totally customizable. Whether you’re hosting a cozy Friendsgiving or a lively Christmas party, this is the one appetizer that can handle a crowd.
It’s perfect for gatherings where you want to offer something a little more elegant than chips and dip, but without spending hours in the kitchen.
What makes it so great for large groups is the variety—it’s not just one dish, it’s a little bit of everything. You can mix and match cheeses, meats, fruits, nuts, and spreads to appeal to a wide range of tastes.
It’s a fun, hands-off way to feed your guests without slaving over a stove. Plus, assembling it is a lot easier than it looks, and I’ll show you how to put together the perfect holiday charcuterie board for up to 30 people.
What You’ll Need to Build the Perfect Charcuterie Board for a Crowd
I was able to purchase all the ingredients for this board at Costco and Whole Foods for a little over $100 plus tax (the board itself not included). It’s an affordable way to put together an impressive, delicious appetizer that’ll feed 30 people!
Whether you’re shopping at Costco for the cheeses, meats, and crackers or popping into Whole Foods for those special finishing touches, you can create a stunning charcuterie board at an affordable cost.
The Board
For this large-scale charcuterie board, I needed something big, portable, and fridge-friendly. I ended up using a large wooden tray (with handles) lined with parchment paper, which worked perfectly. I used a tray similar to this one from Amazon with 20” x 14” x 2.5” dimensions.
It was sturdy enough with raised sides all around to hold all the goodies, and the parchment made cleanup a breeze. If you’re using a board or tray that’s larger than usual, you’ll need to plan ahead to ensure it’ll fit in your fridge for make-ahead storage.
For a crowd of 30, the key is to get creative with how you arrange everything, because it’s not going to all fit in one place. I found that having some items on the side (like crackers and spreads) was a big help when space was limited on the board.
Cheese Selection
Now for the fun part—choosing the cheeses! I recommend 4-5 cheeses in total for your board, each offering something a little different. You’ll want to have a mix of soft, semi-soft, and hard cheeses for variety. For more check out our guide for choosing the best cheeses for your charcuterie board.
For this extra-large holiday charcuterie board, I used the Signature Cheese Flight available from Costco, which includes five cheeses that are perfect for feeding a crowd. I also picked up local favorite Beecher’s Flagship, a sharp, aged cheese that’s perfect for adding a little depth.
The Costco cheese flight is always a great deal and has a nice mix of flavors and textures, but if you’d rather customize your board, here are some other cheeses with broad appeal found at Costco that would work well for this board:
- Kerrygold Reserve Cheddar: A popular sharp option that’s creamy and smooth.
- P’tit Basque: Has a mild, nutty flavor with a slightly tangy finish.
- Smoked Gouda: Adds a wonderful smoky flavor.
- Spanish Manchego: Buttery and slightly nutty, it’s a perfect addition to any board.
- French Brie: Creamy and delicious, always a hit with guests.
- Champignon Cambozola: A funky, creamy blue cheese that will surprise and delight your guests.
- Cranberry Goat Cheese: A cranberry-infused goat cheese that gives the board a bit of holiday flair.
Keep in mind that if you opt for higher-end cheeses (like the P’tit Basque or the Manchego), your budget might go up by $20-30, but it can be worth it for the more unique flavors. If Costco is not an option, you can easily find similar cheeses at your local grocery store or specialty shop.
Choosing Meats
When selecting meats for your charcuterie board, aim for a variety of textures and flavors to appeal to different tastes. Include a mix of cured meats like salami, prosciutto, and chorizo, along with one or two more distinctive options like sopressata or capicola. You’ll want to offer a balance of mild, savory flavors and more bold, spiced options to keep things interesting. Check out our guide to the best charcuterie meats for more.
For this board, I used the Columbus Salame Co. Charcuterie Sampler from Costco, which includes a selection of meats including salami, chorizo, and sopressata. I also added Citterio Prosciutto di Parma for a touch of delicate, savory goodness. This combination offers a nice variety of flavors and textures, ensuring there’s something for everyone to enjoy.
Seasonal Accompaniments
To round out the board, I added seasonal fruits and briny bites that complement the cheese and meats perfectly. Here’s what I included:
- Fruits: Grapes and Mandarin Oranges—both are in season and provide a refreshing contrast to the rich cheeses and meats.
- Nuts: Marcona Almonds, which are buttery and slightly sweet—perfect for a holiday board.
- Pickled & Briny: Cornichons (tiny, tart pickles) and bright green Castelvetrano Olives—these salty bites balance out the richness of the cheese and add a pop of color.
- Whimsy Factor: I threw in some Chocolate-Covered Pretzels for a fun, sweet surprise. It’s the little things like this that make the board feel special and festive.
- Spreads: I used Sour Cherry Jam and Fig Preserves, both of which add a delightful sweetness that perfectly balances the richness of the cheeses. These spreads are easy to serve and elevate the board with their fruity, festive flavors.
- Crackers: For crackers, I went with Raincoast Crisps and Club Crackers from Costco. The Raincoast Crisps add a crunchy, artisanal touch, while the Club Crackers are classic and simple, providing the perfect base for all the cheeses and spreads.
- Green Garnish: For the finishing touch, I picked up a small packet of fresh Soup Blend Herbs which includes bay leaves, rosemary, and thyme for a fresh colorful accent.
These accompaniments are affordable, easy to find, and add a lot of flavor and texture to the board. Plus, they make it look beautiful and colorful, which is key when you’re serving a crowd.
For more in-depth charcuterie board guidance check out our guides to the best jams and spreads for a charcuterie board, simply the best crackers for a charcuterie board, and the best pickles to pair with charcuterie.
Portions and Sizes:
Here’s a simple guide for portions when serving a charcuterie board appetizer:
- Cheese: 1-2 ounces per person.
- Meats: 1-2 ounces per person.
- Crackers, Fruits, Nuts, Pickles & Olives: About 2-3 ounces per person for a combined total.
- Spreads: 1 tablespoon per person.
This keeps things balanced and ensures everyone gets a taste of everything without overdoing it.
*Find the full printable recipe with specific measurements further below.
How to Assemble Your Holiday Charcuterie Board
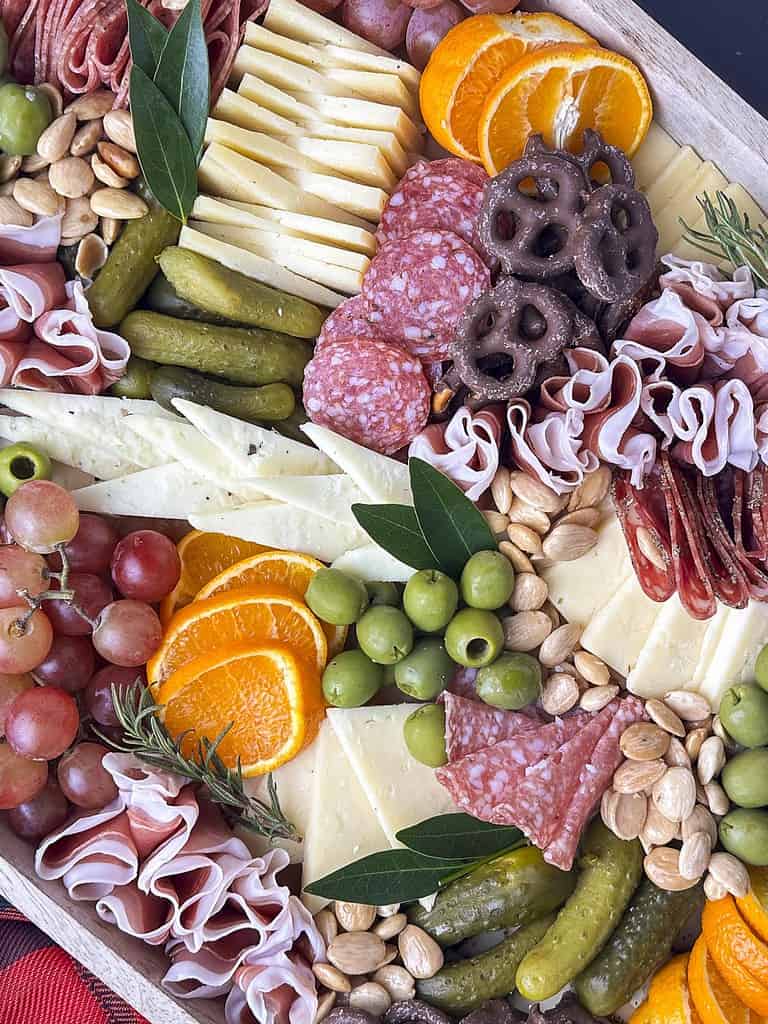
Slicing Cheeses for Best Presentation
When making a charcuterie board for a large group, I highly recommend pre-slicing your cheeses into a few different shapes to create some visual contrast. This also makes it easier for guests to grab and go, which is especially important when you’re serving a crowd. It also gives the board a more polished, inviting look. Just make sure not to slice them too far in advance or they will dry out.
- Wedge shaped: Place the wedge on one of its flat cut sides, then remove the top and bottom rinds. Afterward, slice through the wedge to create even triangle-shaped pieces, leaving the rind on one edge.
- Block shaped: Slice into thin planks and then cut the planks into smaller squares or rectangles.
- Log shaped: Place the log on a flat surface and use a sharp knife to slice it into even discs. Make sure to wipe the knife clean between cuts for neat, smooth slices.
- Small wheels: For Brie, just cut it into small wedges starting from the center like you would when cutting a pie.
Arranging the Board
Start with your cheeses and build out from there. Make sure the slices are uniform and easy to grab. Arrange the cheeses in layered patterns or in small groups spread across the board for balance.
You’ll want to place them at different angles and levels for visual interest, mixing up the types of cheeses with meats and accompaniments. The key is to balance the colors and textures—think about the visual appeal as much as the flavors.
- Meats: I like to fold the sliced salami into quarters to stack together. For the prosciutto, fold in half lengthwise then fold back and forth and pinch at the bottom to fan out at the top. For additional visual instruction for styling charcuterie check out this page.
- Extra Details: For a pop of sweetness, scatter a few chocolate-covered pretzels around the board, along with the olives and cornichons.
- Herbs for Garnish: Fresh bay leaves and rosemary sprigs are a beautiful and fragrant addition. They also help make the board feel extra festive and seasonal.
- On the Side: If you run out of space on the board like I did, don’t stress. Just put the crackers in a separate basket or bowl and serve the spreads in small dishes on the side.
- Serving Utensils: Some small tongs for the board and spoons for the spreads help make it easier for your guests to serve themselves.
How to Serve & Replenish Your Board
Once the board is assembled, make sure to keep things fresh. Replenish as needed—if the board starts to look sparse, quickly restock from your stash in the fridge. I like to use a large refrigerator bag to transport extra ingredients and keep things looking fresh throughout the event.
If you’re adding jams or spreads, place them to the side in small bowls, and encourage guests to spread some onto crackers before moving onto the cheeses and meats. This helps keep everything organized and ensures that people don’t just pile up the crackers with cheese right away (although, no judgment if that happens!).
Pro Tips
- Room temperature: For the best flavor and texture, let your cheeses sit at room temperature for about 30 minutes before serving. This helps them soften and enhances their flavors, making them more enjoyable. Just be sure to not leave them out for more than 2 hours to ensure food safety!
- Get creative with the presentation: Use different textures, heights, and shapes to make the board visually appealing. Use rustic wooden baskets for crackers or fruit, a mix of different shaped boards instead one large one, or even a few small plates on the side to keep things looking organized.
- Keep it simple, but elegant: Stick to classic pairings (cheese, meats, fruit), but throw in something unexpected, like the chocolate-covered pretzels or cranberry goat cheese.
- Don’t forget to replenish: Keep extras on hand and refresh the board every once in a while to make sure everyone has something fresh to nibble on.
FAQs
A holiday charcuterie board for a crowd is the perfect way to keep things simple, seasonal, and, of course, delicious. Whether you’re hosting a cozy Friendsgiving or a festive Christmas gathering, this board will have your guests talking (and coming back for more).
So gather your favorite cheeses, fruits, and a little holiday whimsy, and get ready to serve up a beautiful, crowd-pleasing spread. Happy holidays, and happy entertaining!
HUNGRY FOR MORE? Subscribe to our newsletter and follow on Facebook, Pinterest and Instagram for all the newest recipes!
Enjoyed this recipe? Be sure to leave a 5-star rating and comment—it helps others find our recipes too!

Holiday Charcuterie Board For A Crowd
Equipment
- extra large serving tray or charcuterie board (I used one with 20” x 14” x 2.5” dimensions)
Ingredients
- 48 ounces assorted cheeses (about 3 pounds)
- 32 ounces assorted charcuterie (salami, prosciutto, chorizo) (about 2 pounds)
- 1 pound seedless red grapes
- 1 pound mandarin oranges sliced into rounds
- 10 ounces Castelvetrano olives, pitted
- 10 ounces cornichons or baby dill pickles
- 4 ounces Marcona almonds
- 5 ounces chocolate-covered pretzels
- .5 ounces fresh green herbs like bay leaves, rosemary, thyme
- 30 ounces assorted crackers
- 8 ounces sour cherry jam
- 8 ounces fig preserves
Instructions
- Prepare the Cheeses: Start by slicing the assorted cheeses into a variety of shapes. Cut harder cheeses into triangles or rectangles, softer cheeses into slices or rounds, and arrange them in layers and patterns across the board. Mix different textures like soft, semi-soft, and hard cheeses for visual interest.
- Arrange the Meats: Fold and style the assorted charcuterie (salami, prosciutto, chorizo). Layer them slightly and fan them out on the board to make it easy for guests to grab.
- Arrange the Fruits: Wash and prepare the grapes and slice the mandarin oranges into rounds. Scatter them around the cheeses and meats, adding a pop of color and freshness to the board.
- Add the Briny Elements: Place the Castelvetrano olives and cornichons (or baby dill pickles) in small bowls or directly on the board, filling in any gaps. These briny bites will balance the richness of the cheeses and meats.
- Include the Crunch: Add Marcona almonds and chocolate-covered pretzels to the board. The almonds offer a buttery crunch, while the pretzels provide a sweet and salty contrast.
- Garnish with Fresh Herbs: Scatter fresh green herbs like bay leaves, rosemary, and thyme across the board. These herbs not only add a festive touch but also contribute a pleasant fragrance.
- Crackers and Spreads: Arrange assorted crackers in a basket or bowl next to the board. Set out small dishes of sour cherry jam and fig preserves for spreading. Place small tongs on the board and spoons in the spreads.
- Final Touches: Step back and arrange everything so it looks inviting and balanced. Mix up the colors and textures, creating sections of cheeses, meats, fruits, and crunchy bits. Don’t worry about making it perfect—it’s all about creating a welcoming, festive spread.
- Serve and Enjoy: Gather your guests and enjoy your fabulous holiday charcuterie board!
Recipe Notes
Nutrition
*Nutritional information is provided as a courtesy only and should be construed as an estimate rather than a guarantee. Ingredients can vary and Maplevine Kitchen makes no guarantees to the accuracy of this information.
Don’t forget to pin this for later


Did you make this recipe? Please leave a rating in the comments below and let us know how it turned out. Your feedback is important to us. Thank you for visiting Maplevine Kitchen!


This Holiday Charcuterie Board is a total crowd-pleaser! It’s easy to put together, looks gorgeous, and always impresses guests. Perfect for any holiday celebration!